For out-of-stock items that are in high demand (think Ozempic as an extreme example), you can use waiting lists to manage many patients that are all waiting for the same item to assist with process of allocation and communication.
You may also opt to use a waiting list to keep track of requests for unreleased items (e.g., the following year's influenza vaccine) so you can send out bulk SMS (e.g., a link to book in a vaccination) once you receive stock.
The below video, taken from the Quda Starter Series, demonstrates how this feature works.
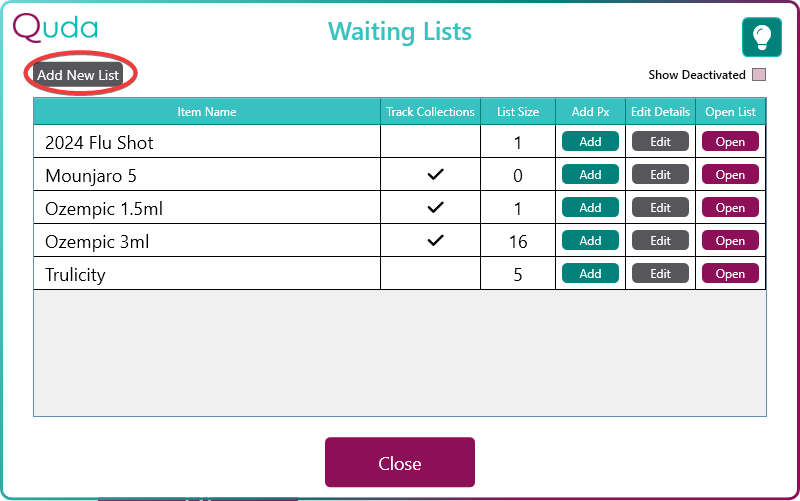
To create a waiting list, start by clicking on the Waiting Lists button in the bottom-left area of the home screen.
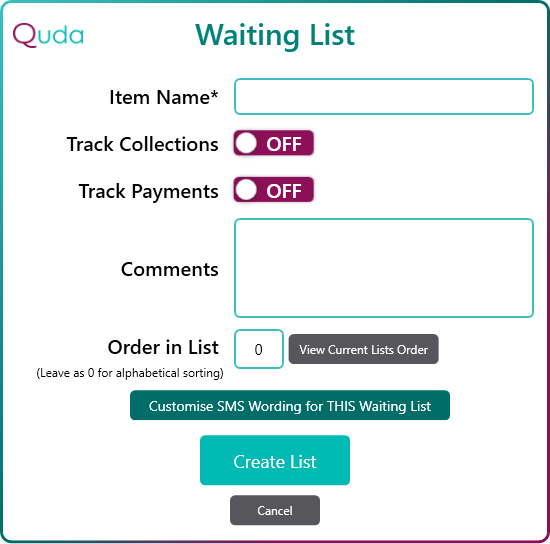
Once in the Waiting Lists menu, click on the Add New List button to create a new waiting list.
1. Type in the Item Name (note that this will feed into your SMS templates).
2. Decide if you want to Track Collections with this list. Turning this setting ON means that you will need to make sure you mark waiting list items as collected when patients come and pick them up, but it also makes it much easier to manage the process of reallocation if stock is not picked up in a timely manner (see more on this later).
3. Decide if you want to Track Payments with this list. Turning this setting ON allows you to mark if a patient has paid for that item already, which may aid you in choosing who gets allocated first down the road.
4. Enter any Comments with your waiting list as needed (e.g., ETA, who to set as priority, what information to provide when adding people to the list, etc). These comments will show when anyone adds someone new to the list, as well as display in the window when you click into the waiting list.
5. Decide if you want to define the order in which this list shows in your various waiting lists. If you leave this as “0”, all your waiting lists will display in alphabetical order.
6. Decide whether you’d like to customise any of the SMS templates (i.e., “Added to Waiting List”, “Waiting List Arrived”, and “Waiting List Reminder”) for this specific list if your global templates don’t fit. All non-customised SMS templates will continue to use the global templates.
Any new waiting lists you create will then show up on the right side of the home screen.
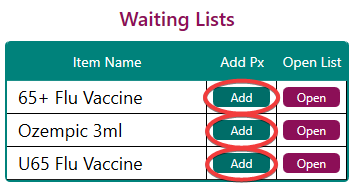
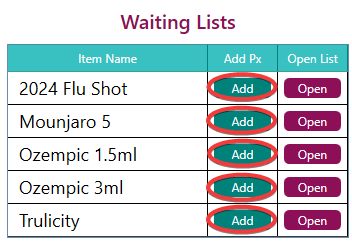
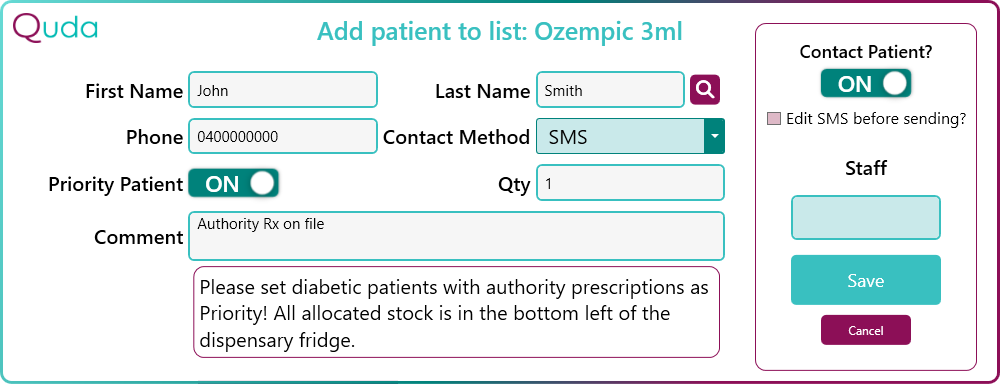
To add patients to a waiting list, click Add next to the relevant list.
You must at least enter the patient’s name and phone number before entering in your staff login code and clicking Save.
However, you may also wish to mark the entry as a Priority Patient, which means they will be added to the list above non-priority patients and below existing priority patients. You can also add in a Comment that can be viewed within the waiting list itself in the future.
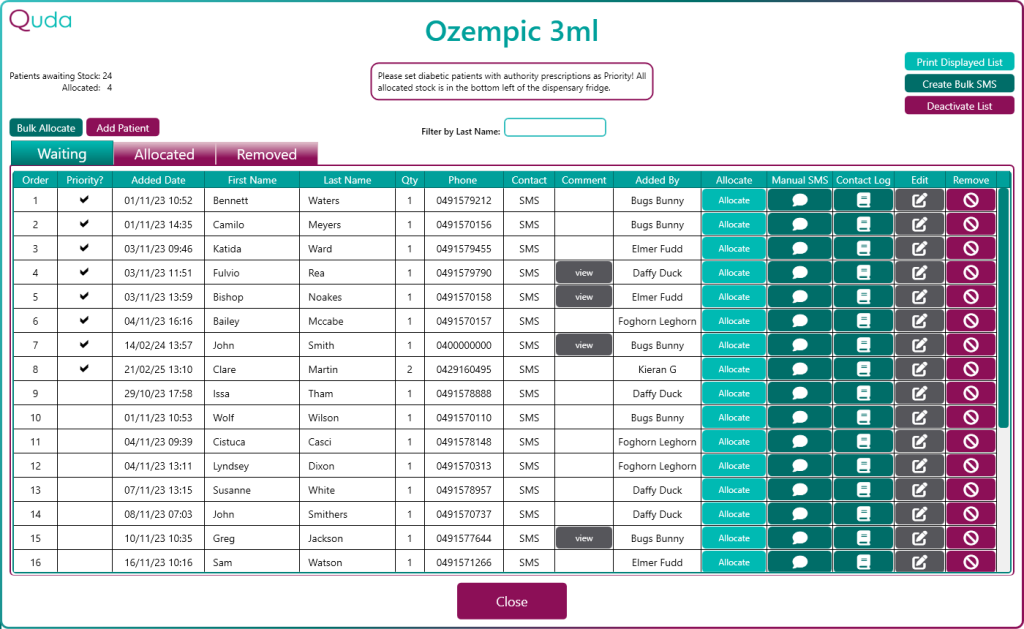
After clicking Open next to your waiting list, you will then see each patient in your waiting list in order of priority and the date on which they were added.
When you start receiving stock, there are 2 methods you can use for allocation:
1. Individually allocate by clicking the Allocate button to the right of each specific row.
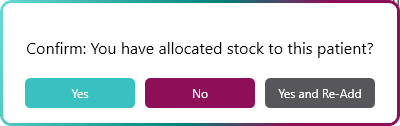
After clicking Yes to “Confirm: You have allocated stock to this patient?” (or Yes and Re-Add if you want to immediately re-add that person back onto the list), an SMS will be sent to notify the patient.
This is the best method if you’ve only received a single unit, or if you wish to allocate stock in an order that does not match the actual order.
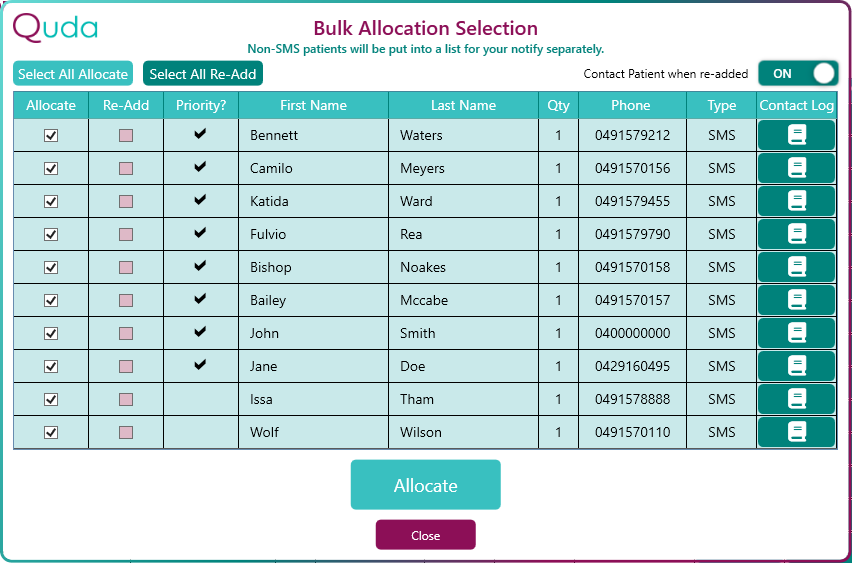
2. Allocate to multiple people at once by clicking the Bulk Allocate button in the top-left area and indicating how many units of stock have arrived for allocation.
After entering the number of units you have available for allocation, that same number of patients from the top of the list will be displayed to you so you can confirm the automatic selection.
You can also choose exactly who you would like to be immediately re-added to the list by ticking the appropriate boxes in the Re-Add column (plus choose if you want them to be SMS’d indicating this by leaving “Contact Patient when re-added” set as ON in the top-right) before clicking Allocate.
After clicking Allocate, each patient will automatically be sent an SMS (and re-added back to the list depending on your choice) in bulk letting them know that stock has arrived for them to pick up.
This is the best method if you’ve received multiple units of stock at once and are happy with the order of your waiting list.
Collection Tracking
If you set the Track Collections setting to ON for a waiting list, a number of extra features become available for you to utilise to help you manage the post-allocation part of the waiting list process, including but not limited to:
– Notification of when someone hasn’t picked up their order within a custom set time period. – The ability to send reminders to patients who haven’t yet picked up their allocated stock. – A Reallocate button that streamlines that process of reallocation.
There are some additional settings you must be mindful to set according to your preference when using this feature however:
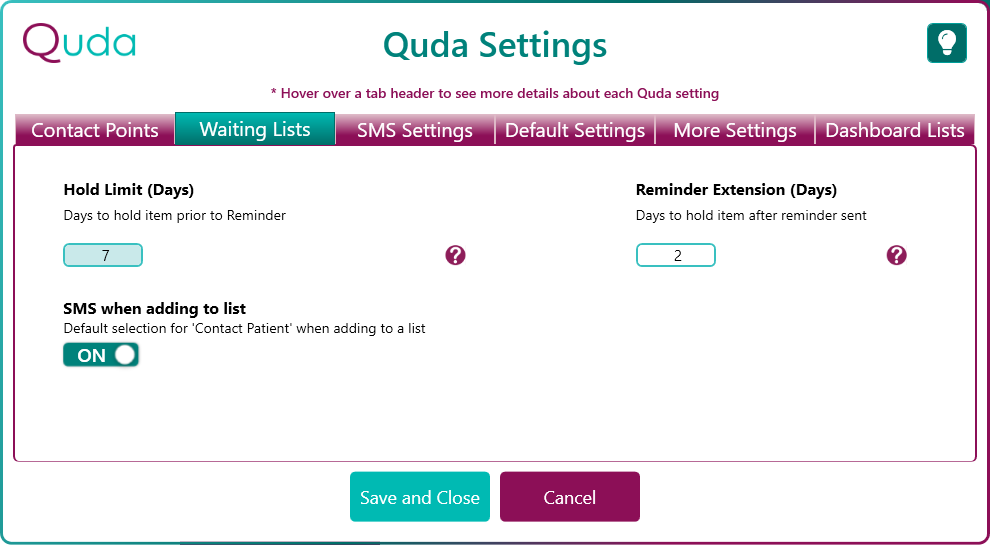
After clicking Quda Settings in the bottom-left of the Quda homescreen, opening up your SMS & App Settings, and clicking into the Waiting Lists tab, you’ll see your Waiting List Settings as shown on the left.
Hold Limit (Days) is the maximum number of days you would like to give patients to pick up stock that has been allocated to them. This number will also feed into your “Added to Waiting List” SMS template to let patients know how long they have to pick up stock.
Reminder Extension (Days) is the number of extra days you can grant a patient to pick up allocated stock after sending them a reminder.
You can also stipulate your preferred default selection for “Contact Patient?” when adding new patients to a waiting list (i.e., decide whether or not they get an SMS notifying them that they’ve been added to a waiting list).
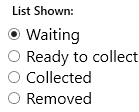
After clicking into a waiting list, you’ll also see in the top-left corner that you can select to view different sub-lists:
Waiting: This is where you can see all of your patients that are still waiting for stock.
Ready to collect: After a patient is allocated stock, they are moved to this list.
Collected: After marking off when a patient comes in and collects their allocated stock, they are moved to this list.
Removed: When any row is removed from any list, it will be moved here.
When a patient comes in and picks up their allocated stock, this must be noted by clicking the Collect button for that patient within the Ready to collect view.
This marks them as collected, and moves the row to the Collected sublist.
Notifications and Reminders
If a patient has not picked up their allocated stock within your custom set Hold Limit, you will see pink text in the top left of the waiting list (as shown on the left) to notify you of this and prompt you to investigate.
The affected row in the Ready to collect sublist will also be highlighted pink, as shown above.
At this point, you can either:
Click the Reallocate button to remove the patient from the list so you can choose a new patient you’d like to reallocate the stock to.
Click the Reminder button to send a reminder SMS and give the patient some more time (specifically the number of days set by your Reminder Extension setting) to pick up the item.
This will also unhighlight the row and remove the notification text.
If allocated stock is still not picked up within your custom set Reminder Extension period after sending a reminder, notification text in the top-left of your waiting list will say “1 Item REMINDER overdue!”, and the row will be highlighted red as shown above.
At this point, while it’s probably best to reallocate the stock, you can continue sending reminders and re-prompting the patient as much as you like.